
Customizing the fingering settings on an electronic wind instrument typically involves the following steps:
1. Understanding the Instrument's Capabilities
Read the Manual: The first and most important step is to thoroughly read the user manual of your electronic wind instrument. The manual will provide detailed information about whether the instrument supports fingering customization and what specific options are available. It may also list any limitations or special considerations.
Identify Customizable Elements: Determine which parts of the fingering can be customized. This could include individual keys, combinations of keys, or specific functions such as octave switching, sound selection, or effect activation.
2. Accessing the Customization Mode
Enter Setup Menu: Most electronic wind instruments have a setup or menu button. Press this button to enter the instrument's setup menu. On some models, you may need to hold down multiple buttons simultaneously to access the customization mode. The exact method should be described in the user manual.
Navigate the Menu: Once in the setup menu, use the instrument's navigation buttons (which could be arrow keys, a dial, or other controls) to find the fingering customization section. This may be labeled as "Fingering Settings," "Key Mapping," or something similar.
3. Making the Customization
Select a Key or Function: In the fingering customization section, you will be able to select a specific key or function that you want to customize. For example, you might choose a particular key on the instrument's body.
Assign a New Value: After selecting the key, you can then assign a new note, sound, or function to it. This could involve selecting from a list of available options (such as a list of musical notes, different sound presets, or effect types) or entering a specific value manually. Some instruments may allow you to set parameters such as the velocity sensitivity or range of the key as well.
Test and Adjust: After making an assignment, it's important to test the new fingering setting. Play the instrument to see if the key now functions as expected. If not, you can go back into the customization menu and make adjustments until you achieve the desired result.
4. Saving the Customized Settings
Save the Configuration: Once you are satisfied with your fingering customizations, you need to save the settings. There is usually a "Save" or "Store" button in the setup menu. Press this button to save the customized fingering settings to the instrument's memory. Some instruments may also offer the option to save multiple sets of settings, allowing you to switch between different fingering configurations for different playing scenarios.
It should be noted that the specific steps can vary greatly depending on the make and model of the electronic wind instrument. If you encounter difficulties during the customization process, it is recommended that you consult the manufacturer's support resources, such as their customer service department or online forums dedicated to the instrument.
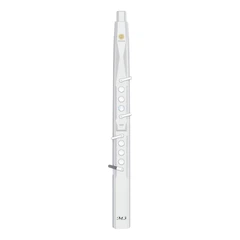
SUNRISE MELODY M3 Electronic Wind Instrument - The best-selling Electronic Wind Instrument
. 66 Timbres
. Built-in Speaker
. Connect Bluetooth
. Ultra-long Polymer Lithium Battery Life
